
What is the video production workflow for small business
The biggest hurdle for many small business owners is the time commitment needed for video production. They don’t understand what’s truly required for producing videos for small business.
They experience big budget movies, like Star Wars, and feel the process is too costly and too time consuming for them.
So if you’re one of these business owners, then this article is for you. I’ll give a 300 foot overhead view of what a typical video production workflow looks like when I work with a small business owner.
As a video producer (and business owner myself), I understand that time is precious. Nobody has a week every month to film videos for their social media.
This is why I developed a system where I shoot a month’s worth of social media videos in 1 day. A system I call the 30 in 1 video marketing plan.
In this plan, I spend 10 hours at my studio to produce enough video content for a month (assuming you post daily on YouTube or Facebook).
It seems like a tall task. And it is for the unprepared. But here how I do it, and you can either use these video tips yourself or hire us to produce these videos for you.
Pre Production
The first step in the process is to figure out what you will talk about. What 30 things can you talk about? The best way to approach this is to do keyword research on your topic.
Create 30 Topics to Discuss in Your Videos
For example, in my business, my main keyword is video production. I need to create a list of video topics (at least 30 for a month’s worth of videos). The best website is to go to answerthepublic.com.
In this website, you can search by keywords and get a list of queries users are searching for on Google or Bing.
For video production, a list of questions could be the following:
- Why is video production is important?
- Can video production help my business?
- What is corporate video production?
- What is the difference between videography and video production?
AnswerThePublic can help you get a ton of content ideas. In fact, this blog article is a prime example where I’m answering the query “what is the video production workflow.”
List Metaphors or Stories to Backup Your Points
Once you’ve got your 30 topics, you’ll need to create a story or metaphor or examples to back up your answer. If all you do is straight out answer the query, you’ll end up with a 30 second video. Perhaps that will work on a platform for Tik Tok but certainly that’s not enough for a compelling video on YouTube.
It’s best to use stories or metaphors to help your audience understand. Don’t take my word for it. Read about this powerful process on Psychology Today.
Once you’ve got 30 stories or metaphors to help elucidate your point, write them down. I suggest using a spreadsheet like Excel or Google sheets to list the topics you’d like to discuss as well as their corresponding metaphors, stories and examples to back up your answer.
Develop Hooks for Your Videos
Next, you’ll need to develop your “hooks.” Hooks are 5-10 second gimmicks you use at the start of any video. These are very important as you want to keep your viewers watching the video.
If you chart out the attention span of YouTube users for a video, you’ll see it’s a downward sloping curve:

Consider this chart for one of my YouTube videos. Based on this chart, I only retain 80% of my viewers after 10 seconds. You want to keep this as high as possible as the longer a viewer stays past 10 seconds, the more likely they will watch more of your video.
This is why developing hooks are important. This is why you see some YouTubers create really fancy hooks so that you can stay engaged. If you’re planning 30 videos, I suggest making about 40. Why 40?
So you if you don’t like 10 of them, you’ll have many more left over to choose from when you get to Post Production.
Here are 5 ways to create a hook:
- State a crucial statistic and promise the explanation if they keep watching.
- State a learning point and promise how you learned it.
- Offer an incredible deal which they can redeem at the end of the video.
- State a big problem and promise how they can fix it by watching your video.
- Do something unexpected – like play an instrument and tie it back to your topic.
These are just some ways to hook your video. Think of them as “pattern interrupts” to get your viewer hooked and watching.
Video Production
Now that you’ve got your topics, hooks and metaphors — it’s time to actually film your video.
If you don’t have much gear, then you can make videos with your iPhone and a simple tripod. I highly suggest investing in a microphone. It seems counter intuitive, but the audio is more important than the video itself.
You can always edit bad footage but you can NEVER fix bad audio!
So invest in a microphone that works best.
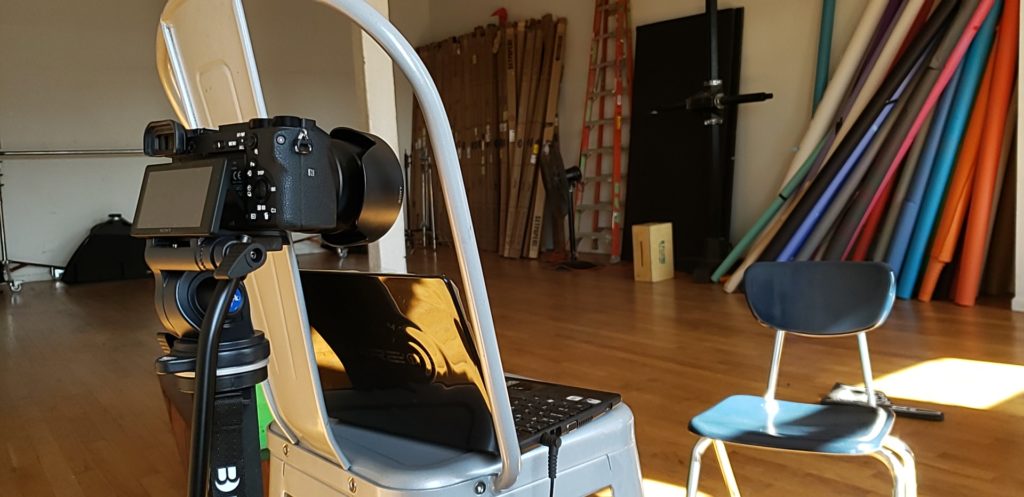
For a slightly more professional setup, invest in a DSLR camera. I personally use a Sony a6500, which you can get for around $1,000.
You’ll also need a tripod for steady gear (or a monopod). And again, invest in a microphone and perhaps an H4N recorder.
Schedule time for Filming
Now you need to free up your day for filming. If you’re like my team at 2Bridges, you’ll need about 10 hours to get through your content plan.
Then start filming. The biggest mistake is to shoot one video at a time. Remember, each video should consist of 4 things:
- The hook.
- The problem you’re answering
- The answer to the problem
- The metaphor or story to back up your answer
The worst mistake you can make is to shoot 1 video at a time with all the elements together. This is just not the best way to go about it.
The best way to film your content is to break it up by content types. Let me explain.
Spend 2 hours filming just your hooks.
Then spend the rest of the day just answering questions and stating your metaphors and stories.
The reason for this is for post production. When you get to the editing portion (post production), you can decide which hook fits into the question and answer (Q/A) video portion.
Some hooks will work naturally with certain Q/A clips. But some are more versatile and perhaps you’d like to mix and match. It’s best to separate the hooks versus the Q/A clips when filming and then decide what goes with what in post production.
Unless you’re a pro or an experienced vlogger, it’s hard to get into a “flow” state when making videos. When you start filming the hooks, they’re short and easy. It will help you get into the rhythm which will help you when you get to the meatier parts of the video — the Q/A sections.
Clap Before Every Take
Clap your 2 hands. Make it loud and make it count so both the camera mic and your external mic captures the audio. This is especially important if you are using an external recorder like an H4N and a Camera Mic.
Get a Friend to Help
Finally, consider getting someone to help you out. You can certainly do the filming yourself. But it certainly helps when you have someone asking you questions and you answer them. It will feel more conversational.
Once you have more experience, then it will easy enough to draw on your experience and naturally answer questions. However, this is often not the case for beginners.
So if you’re just starting out, get a friend or family member to help you out. Have them ask you questions and you answer them.
Post Production
Once you upload your footage to your computer, a daunting task awaits you. You’ll need to put all the footage together.
At a minimum, you’ll need a free editing software like iMovie. I personally suggest the free version of Da Vinci Resolve. Yes, it is more involved. You will need to spend a few hours (perhaps a day watching tutorials) but it is the best free software that has professional tools.
It can help you create animations and sync your audio clips with the camera audio.
Speaking of syncing the audio, remember the tip to clap your hands? This is when it pays off. If you zoom into the audio clips, you’ll see a big spike in the sound. This is the clap.
If you used an external audio recorder, make sure to “sync” the audio from this recorder and match it with the spike on the camera audio recording.
You’ll want to use your external audio recording as this is often the best audio for your video.
Other things to remember:
- Logo
- Color Schemes
- Music
- Thumbnail art
You’ll want to think of these things so your videos look and feel the same. Thumbnails are especially important as this impacts CTR and whether or not a user will click to view your videos.
If you research established content creators in YouTube, you’ll see they often use the same style of thumbnails for their videos.
You’ll need to develop your own style so when users subscribe to your channel — they’ll know what you’re thumbnails look like. It’s essentially branding for your videos.
Post production is a very time consuming task. You’ll be syncing audio, rearranging clips, adjusting music audio, developing thumbnails… and the list goes on.
You can certainly do this yourself, but do consider hiring a professional to help you edit these videos so you can focus more on your core business.
Final Word
I’ve simplified the process of filmmaking for you. It’s a time consuming task, but definitely doable to produce videos if you have a system.
The biggest mistake you can make is to produce videos without a plan. You’ll end up wasting time and become frustrated. What I’ve provided is a basic overhead view of what my team does for all our video marketing clients.
This article was meant to give you a general overview of what a video production workflow looks like for a small business.
Again, the best course of action is to hire a video marketing specialist so you can focus on what you’re best at — your core business.
