
How to Create a Video Game Montage
Video games (whether they are informational or entertainment or both) represent the most popular niche on YouTube.
Often, YouTube creators make creative use of the montage technique to highlight their accomplishments or show something cool.
Indeed, the montage technique is the best way to quickly “get to the good stuff.”
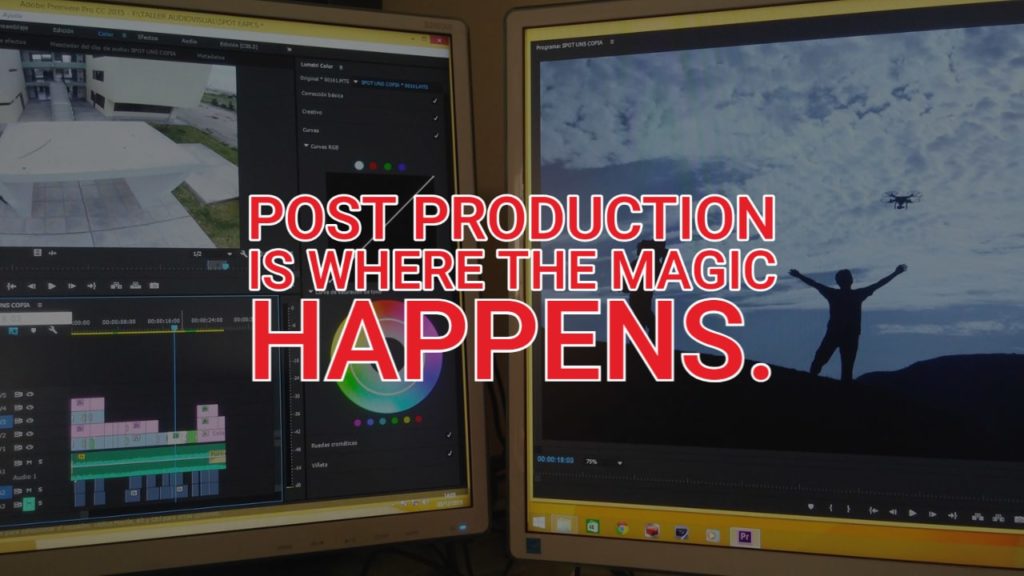
In the world of filmmaking, a film montage is a specific combination of frames, often highly stylized to tell a story. It’s a post production, editing technique to break up the monotony of a movie and convey information in a short amount of time.
When done right, it’s a powerful technique to “wow” your audience and make a lasting impression. An excellent example would be this montage from the movie “UP”:
In just 4-5 minutes, a classic montage told the life story of the couple.
So if you want to stand out as a YouTube video game creator, you’ll need to master this form of filmmaking and incorporate the technique in your editing workflow.
Here’s what you’ll need to start producing amazing video game montages
Part 1: Equipment
A Capture Card – the most essential part of making a montage. Essentially this gets video from your Xbox 360, PS3, or Wii, and saves it into a video format on your computer.
If you’re making montages from PC games, then you can simply get a screen capture software. Something like Gecata or Bandicam.
Types of Capture Cards for consoles:
These range in price from low-to-mid quality models such as the Pinnacle Dazzle DVD to the high-end HD recorders such as the Black Magic Design Intensity Pro.
The Pinnacle model captures in lower resolution, and only has input for composite video and S-Video.
The Intensity Pro and virtually all other high end models have either Component video or HDMI in/out, thus leading to extremely high resolution video.
Capture cards also differ in their physical appearance. Some are external, meaning you plug them into your computer via a USB, Firewire, DVI, or other input source. Internal capture cards are ones that you have to open up your computer, insert the capture card, and plug the input/output wires into the back of your computer.
Which Card is Right for You
The main factor in this is your budget. For less than $100, you can get a reasonable quality capturing device that will suit the average user’s needs quite well. The quality would not be as good as a higher end model.
On the other end of the spectrum come the high end models. The quality is usually stunning, with models now capable of capturing in 1080p and 720p.
Another thing to consider is ease of use. If you’re not familiar opening up your computer or if you are using a laptop, an external capture card is recommended. Internals are usually a little less expensive due to their lack of chords, housings, etc.
Again, the most important factor in deciding which way to go is your budget, and how often you will use it.
Cables and Splitters
This is all dependent on your capture card. If it takes the Red, White, and Yellow Composite inputs, you will need splitters.

Splitters allow you to have the signal go to both your computer and your TV, so you can capture while you play.
A great example video for setting up the Dazzle is here: Dazzle Setup. If you are using a higher end card, it usually has both inputs and outputs, or you will need an HDMI or Component video splitter.
Part 2: Capturing
Now that that you know what hardware you need, you need to get capturing. Halo 3’s theater feature makes it easy to record, send, and save films.
This makes it easier to make montages for a large community or a only a few people.
So you have your card and wires all taken care of, now its time to decide which clips you should use in your montages.
The general rule of thumb is to use clips that represent skill, whether that be having good aim, a good strategy, or other amazing feats.
Halo 3 has a theater feature that makes it easier to to filter through gameplay.
As far as other games go, they don’t have a theater feature, so just capture yourself playing and edit out all those times you got shot in the head by a noob with a machine gun. Later, after capturing to your hearts content (and your PC’s hard drive space), you can edit out the flaws and make a sick looking montage.
Now you’re ready to capture. To capture in the highest quality possible, go into whatever capturing software you use. This will usually come with your capture card, if not, just use whichever editing program you have (we’ll talk about these later).
Go into Capture Settings, Capture Properties, or whatever way you can change the video quality. Some programs only allow you to set it from a scale of Fair, Good, Better, Best.
If you can avoid these, do so. Set the resolution to the max, and the data exchange rate to almost max (don’t max it out unless your PC has a very fast processor). Click the capture button and let your creativity run wild.
Part 3: Editing
So first off, there are three main different levels of editing programs:
Low/Poor – Windows Movie Maker. Not recommended. It is very basic, but it is one of the few free options.
Medium – Editors such as Pinnacle Studio 12. Not the greatest. Offers some advanced features, crashes alot. If you get a Dazzle, it comes with Pinnacle Studio. Although I highly recommend upper level software, this will do if you don’t have the money right now.
High/Professional – Editors such as Da Vinci Resolve, Adobe After Effects, and many, many others. These are industry standard, and offer the most amount of time to get used to. Not recommended for normal users (those who capture every few weeks).
Although I would love to go through editing a video step by step, it would take way to long to fit into one article.
The idea is to add effects that complement the music. See many examples of great montages here for inspiration of what some of these editors can do.
Another monumental part of the editing process is choosing a good song that your audience would enjoy. Most people that will watch your videos will probably like rock, rap, and pop.
The best thing about the internet is that nobody can tell you what to do (except the FBI, that’s a whole different story 😀 ). Anyway, do what you want! Try to set the kills to the beat of the music.
By the way, don’t pick copyrighted songs that the sites such as YouTube will remove due to copyright issues.
Pick a song that’s a little less popular, you don’t have to choose everyone’s favorite song, as chances are it is overused and uninteresting.
Another alternative (perhaps reinvest all the ad and sponsorship money) is to subscribe to Artlist.io. They have all kinds of music that is copyright free so long as you stay subscribed. You’ll never run out of music.
When you have it all edited, save your project and continue reading.
Part 4: Publication
This is where some of the best montages can go downhill. When you click the “Make Movie”, “Render”, or “Export” button (it just depends on your editing software), crank up the video settings to the max.
You want a good resolution, 720p at least, or 1080p if your computer and your capture card are of high enough quality.
Next comes an important decision. You’ve made your montage, but really, who cares? Until you upload it to a video hosting site, nobody!
YouTube is GREAT. Although the video quality can be slightly lower than of other sites, it gets the most visits by far, and your video has a greater chance of getting watched, just keep uploading and you’ll eventually get more and more subscribers.
Other places to upload include Vimeo, which has great quality, and a bunch of professional players to offer criticism. Other video sharing sites will do fine too, it really is up to you.
When your montage is up on the hosting site of your choice, sit back, relax, and enjoy the glory!
